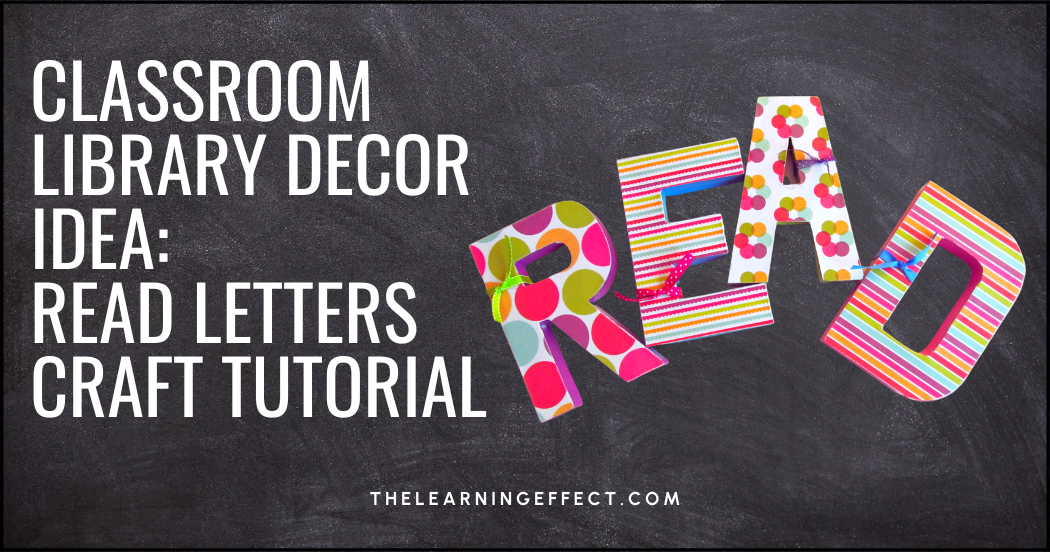
Want to add a pop of color to your classroom library without breaking the bank? This READ letters tutorial will walk you through creating custom decor that matches your theme – and it takes less than 30 minutes! Whether you’re setting up your space for a new school year or giving your reading corner a mid-year refresh, these DIY letters are an easy win.
When I started teaching 4th grade, I knew I wanted my classroom library to feel inviting and bright. I wanted students to actually be drawn to the space, you know? So instead of spending a fortune on pre-made decor that might not even match my theme, I decided to get a little crafty. The result? These custom READ letters that became one of my favorite touches in the classroom.
Why This READ Letters Tutorial Works
Here’s what makes this project perfect for busy teachers:
It’s budget-friendly. You probably already have some of these supplies, and the total cost is usually under $20 – way less than store-bought classroom decor.
It’s customizable. Match any color scheme or theme you’re using. I went with bright, cheerful colors, but you could easily adapt this to fit a farmhouse vibe, a jungle theme, or whatever you’re working with.
It’s quick. Between grading papers and planning lessons, who has time for complicated craft projects? This one truly takes less than 30 minutes of active work (plus drying time, of course).
It makes an impact. Students notice when you put effort into creating a welcoming space, and a bright, eye-catching reading area sends the message that reading matters in your classroom.
Supplies You’ll Need
Before you get started, gather these supplies:
- newspaper to protect your work surface
- scissors
- papier-mâché letters – purchased at Michaels
- acrylic paint – 4 colors that match the scrapbook paper
- scrapbook paper – 4 sheets
- Mod Podge
- foam brush
- ribbon
- Command Mini Hooks or hammer/nails
As an Amazon Associate, I may earn a small commission if you purchase through my links at no additional cost to you.
Step-by-Step READ Letters Tutorial
Ready to create your own classroom library decor? Here’s how:
Step 1: Protect Your Surface
Lay newspaper out on your workspace. Paint and Mod Podge can get messy, and trust me, you don’t want to spend your time scrubbing your kitchen table later!

Step 2: Trace and Cut Your Paper
This is where the magic starts. Flip each letter upside down and trace it on the back of your scrapbook paper. Why upside down? Because it makes cutting so much easier, and you won’t see any pencil marks on the finished product.
Cut out each traced letter carefully. These pieces will cover the front of your papier-mâché letters, so you want them to fit as closely as possible.
Step 3: Paint the Sides
Here’s where you get to play with color! Paint the sides of each letter with acrylic paint that coordinates with the scrapbook paper you chose. I picked bright, bold colors because I wanted the letters to really stand out, but you could go for something more neutral if that fits your classroom theme better.
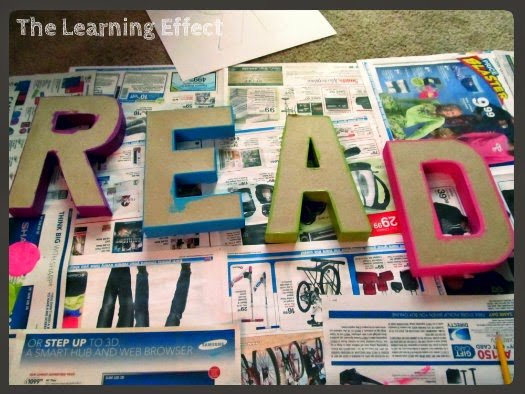
Don’t worry about getting the paint perfect on the top of the letters – you’ll be covering that with paper anyway. Just focus on those sides!
Let the paint dry completely before moving on. I usually set them aside for about 20-30 minutes while I work on something else (like finally drinking that cold cup of coffee).
Step 4: Attach the Scrapbook Paper
Once your paint is dry, it’s time to add the decorative paper. Using a foam brush, apply a thin, even layer of Mod Podge to the top of one letter. Don’t go overboard – too much glue can make the paper bubble up.
Carefully place your cut piece of scrapbook paper on top and smooth it out with your fingers, working from the center outward to remove any air bubbles.
Repeat this process for all four letters. Then, let them dry completely. This is important—if you rush to the next step, you’ll end up with soggy, bubbly paper. Ask me how I know! (Let’s just say my first attempt wasn’t Pinterest-worthy.)
Step 5: Seal with Mod Podge
After everything is completely dry, apply a thin coat of Mod Podge over the top of each letter and along the painted sides. This seals everything and gives your letters a nice, finished look. It also makes them more durable, which matters when you’re moving them around your classroom or if curious little hands decide to investigate your reading corner.
Let this final layer dry thoroughly – at least an hour if you can.
Step 6: Add Ribbon (Optional)
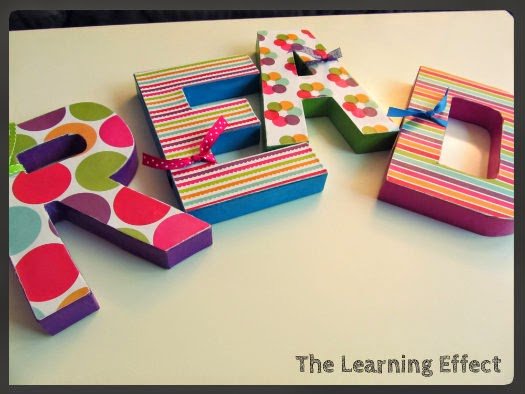
Want to add a little extra flair? Tie a piece of coordinating ribbon onto each letter as a decorative accent. I tied mine in simple bows at the top corner of each letter, but you could also do a side tie or wrap it around for a different look. This step is totally optional, but it adds a nice finishing touch that pulls the whole look together.
You can skip this step if you prefer a cleaner, simpler look!
First, trace the letters, upside down, on the backside of the scrapbook paper. This allows you to cut out the exact size for the front of the letters.
Then, paint the sides with colors that coordinate with the scrapbook paper you chose for each letter.
After the paint dries, use a foam brush to apply Mod Podge to the top of the letters. This will adhere the scrapbook paper to the letters. Once the glue dries, clear coated the top and sides of the letters with the Mod Podge. Make sure the glue under the scrapbook paper is completely dry before doing this or the scrapbook paper can end up soggy and bubbly.
Add a piece of coordinating ribbon to each letter.
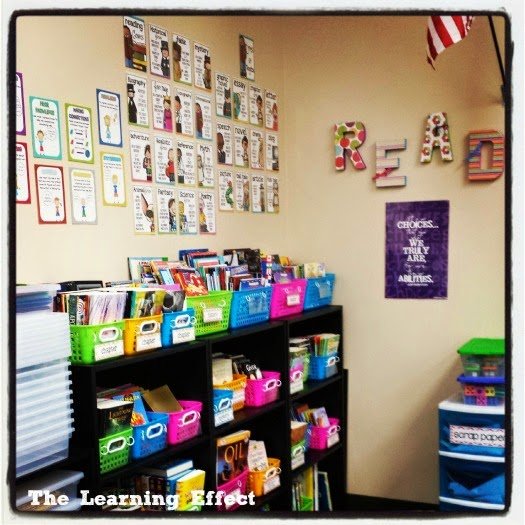
How to Display Your READ Letters
Now for the fun part – showing off your handiwork! Here are a few options:
Wall mounting: I used Command Mini Hooks to hang mine, and they’ve stayed put for years. Here’s a trick that worked well: I used scissors to make a small cut in the back of each letter near the top, slipped the hook inside, and pressed it against the wall. No holes in the wall, and the hooks are practically invisible.
If your school allows you to use nails, that works too! Just make sure you hang them at a height where students can see them but not be tempted to pull them down.
Bookshelf display: Not allowed to put things on your walls? No problem! These letters stand up beautifully on top of a bookshelf. I’ve done this in classrooms where wall space was limited, and it still creates that welcoming reading corner vibe.
Bulletin board accent: If you have a reading-focused bulletin board, you can attach these letters right to the board as a header. Just use push pins through the back of each letter.
Troubleshooting Tips for Your READ Letters Tutorial
Let me save you from a few mistakes I made along the way:
Problem: The scrapbook paper is bubbling up. Solution: You probably added too much Mod Podge or didn’t let the first layer dry completely. If this happens, you can try smoothing it out gently with your fingers while it’s still wet, or start over with a fresh piece of paper. Less is more with the glue!
Problem: The paint is bleeding through the paper. Solution: Use a thicker scrapbook paper or add a second coat of paint to the sides before applying the paper. Darker paints sometimes show through lighter papers.
Problem: The letters keep falling off the wall. Solution: If you’re using Command Hooks, make sure you’re pressing them firmly against both the letter and the wall for the full 30 seconds the package recommends. If they’re still falling, the letters might be too heavy for mini hooks – try the regular-sized Command Hooks instead.
Problem: I can’t find papier-mâché letters. Solution: You can use wooden letters instead! The process is exactly the same, though wooden letters may require a bit more paint to get good coverage. Foam letters also work, but they’re harder to cut into for hanging.

Ways to Adapt This Project
Once you’ve mastered this READ letters tutorial, the possibilities are endless! Here are some variations I’ve tried or seen other teachers use:
- Different words: STEM, MATH, SCIENCE, CREATE, WRITE, LEARN – whatever fits your classroom focus
- Student names: Make personalized letters for birthday displays or student of the week features
- Smaller letters: Use 3-4 inch letters instead of the larger ones for bulletin board titles or locker decorations
- Theme variations: Use themed scrapbook paper (nautical, space, sports) to tie into your overall classroom decor
- Grade level pride: Spell out “4th Grade” or “Room 204” for your door or entrance area
I’ve also seen teachers get creative with other classroom library decor ideas, combining these letters with book bins, cozy seating, and themed posters to create a truly inviting space.
Making Your Classroom Library Shine
Creating these READ letters is just one small way to show students that reading is important in your classroom. When you’re planning for back to school, think about all the little touches that make your space feel welcoming and organized. It doesn’t have to be complicated or expensive – sometimes the simplest projects make the biggest impact.
I loved seeing students naturally gravitate toward the reading corner once these letters were up. There’s something about a dedicated, thoughtfully decorated space that tells kids, “This is a special place.” And honestly, as teachers, we spend so much time in our classrooms that we deserve to be surrounded by things that make us happy too.
Your Turn!
Now you’ve got everything you need to create your own custom classroom library decor! This READ letters tutorial is forgiving for craft beginners (trust me, if I can do it, anyone can), and the end result looks way more impressive than the effort required.
Links last updated 11/23/2025.